
Gaming Chair Ergonomics: Master Your Adjustments
By Owen McKay • 2nd May

When you sit down to work (or game) for eight hours straight, the difference between a chair that fits and one that doesn't isn't comfort; it's the difference between focused energy and afternoon aches. Ergonomic gamer chairs and gaming chair ergonomics aren't a luxury; they're tools for protecting your body while you perform at your best. The real power, though, comes from understanding how to dial in each adjustment so the chair works for you, not against you. Not sure whether a gaming chair or an office task chair suits your workload? See our gaming vs office chair guide. Most people buy a chair, make a few random tweaks, and then wonder why their shoulders still hurt. What they're missing is a stepwise approach to fit, one that takes twenty minutes upfront and compounds into weeks of better posture, energy, and focus.
Why Fit Matters More Than You Think
I learned this the hard way. On a hectic Monday rollout at a startup, I had twelve people and twenty minutes to set up new workstations. We skipped the usual hand-waving and instead mapped thigh clearance, dialed tilt tension, set seat depth, and saved each profile on cards so people could return to their settings. Two weeks later? Fewer break tickets, fewer complaints, happier shoulders. That's when I committed to the belief that guides my work: confidence with controls is half the battle; small tweaks compound into big comfort and focus dividends.
Your body is unique. Standard office chairs are designed for the 50th percentile (the statistical middle). If you're taller, shorter, heavier, or carry your weight differently, a "standard" fit leaves critical pressure points unaddressed. Seat depth that works for one person can press against the back of your knee for another, restricting circulation and compressing the sciatic nerve. Backrest height that supports a taller frame might leave a shorter person's lumbar spine unsupported. The fix isn't a new chair; it's confidence with your controls.
Step 1: Measure Yourself (5 Minutes)
Before you touch a single lever, know your dimensions. This isn't vanity; it's precision.
What to measure:
- Your height (in shoes if that's how you'll work)
- Your inseam (knee to floor, sitting position)
- Your torso length (seated, from tailbone to top of head)
- Hip width (side to side, at widest point)
Why it matters: Most ergonomic chair specifications reference these numbers. Once you know them, you can cross-reference against BIFMA G1-2013 guidelines (the standard that defines fit for 95% of the adult population). A chair designed for the 95th percentile male (roughly 6'2", 246 lbs) differs dramatically from one for the 5th percentile female (roughly 4'11", 113 lbs) in seat depth, height, and backrest length. Knowing where you fall on that spectrum means you stop guessing.
Step 2: Seat Height & Foot Position (3 Minutes)
This is the easiest adjustment to get wrong because it feels obvious. It's not.
The goal: Hips slightly above knees, feet flat on the floor or footrest.
How to set it:
- Sit upright with your back against the backrest.
- Let your arms hang naturally at your sides.
- Adjust the seat height lever until your elbows are at 90 degrees to your desk surface.
- Now check your feet: they should rest flat, not dangle.
- If your feet don't reach, use a footrest. If the seat is too low even at its minimum, your desk might be too high (that's a separate fix), but don't compromise seat height to compensate. For full desk and monitor alignment, follow our ergonomic workstation setup guide.
Pro tip: Seat height also affects your lumbar curve. Too low, and your lower back rounds. Too high, and you slouch forward to reach your desk. Set height first; everything else follows.
Step 3: Seat Depth (3 Minutes)
This is the overlooked control that changes everything.
The goal: Your thighs fully supported without pressure behind your knees.
How to set it:
- Sit back fully into the backrest.
- Check the gap between the front of the seat and the back of your knees: ideally 2-4 fingers' width of space.
- If a gap is too small, the seat is too deep. Many chairs with seat sliders let you pull the seat forward to shorten it.
- If your thighs have no support at the front, the seat is too short. You'll need a deeper model, especially if you're tall or have long femurs.
Why it matters: A seat that's too deep compresses the blood vessels and nerves behind your knee, leading to pins-and-needles sensations, swelling, and sciatica over time. A seat that's too shallow leaves your thighs unsupported, shifting pressure to your tailbone and lower back. Set depth, then move. You should feel equally supported across your entire thigh.
Step 4: Backrest Height & Lumbar Support (3 Minutes)
The goal: Your entire spine supported, with gentle contact at your lower back (lumbar curve).
How to set it:
- Adjust the lumbar support height so it makes contact with the natural curve of your lower back, usually 4-6 inches above your seat.
- Tighten or loosen the lumbar firmness dial until you feel support without pressure. It should feel like a hand gently cupping your lower back, not a fist pushing in.
- Check that the top of the backrest reaches to your mid-shoulder or higher. If it's too low, your upper back and neck won't be supported during recline or long sessions.
For tall users: Ensure backrest height reaches at least to your shoulders (36 inches or more from the floor). Standard backrest heights often fall short for anyone over 6 feet. For a deeper dive into preventing back pain, read our lumbar support guide.
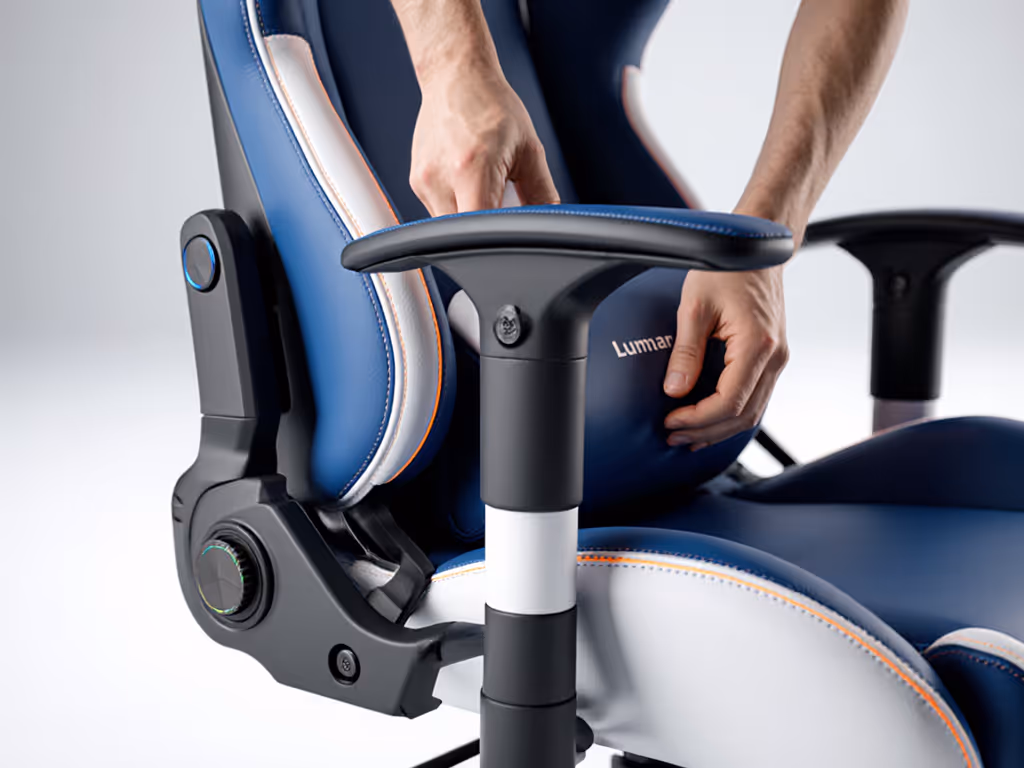
Step 5: Armrest Geometry (2 Minutes)
The goal: Elbows supported at desk height without strain on shoulders or wrists.
How to set it:
- Adjust armrest height so your elbows rest at 90 degrees when your hands are on your keyboard.
- If the armrests are too high, you'll shrug your shoulders and create tension. Too low, and you'll reach down, straining your wrists.
- Check armrest width: they should sit just inside your hip width to avoid restricting your torso.
- If your chair has adjustable armrest pivot or tilt, test it with your hands in typing position. Some people prefer a slight inward angle; others prefer neutral.
Common mistake: Many people leave armrests at the factory default, which is rarely correct. Spending two minutes here prevents weeks of shoulder pain. Need help choosing supports that actually protect your shoulders? Compare 4D vs 3D armrests.
Step 6: Recline Tension (2 Minutes)
The goal: Recline support that lets you shift posture without collapsing backward.
How to set it:
- Locate the tension knob (usually on the underside of the seat or side of the base).
- Sit upright and gently rock backward. The chair should resist slightly, supporting your weight.
- Adjust the tension dial until light backward pressure feels smooth, not stiff and not loose. You should feel supported, not trapped.
- Lock the recline if you prefer upright work, or leave it unlocked if you like to shift between upright and slight recline during the day.
Why it matters: Recline tension is often ignored, but it directly affects how much effort your muscles spend stabilizing you versus how much you can relax. Too much tension, and you're fighting the chair. Too little, and you're working to stay upright. This single control can reduce afternoon fatigue.

The Science (Friendly Precision)
You might wonder why all of this matters. Ergonomics isn't arbitrary; it's biomechanics applied to comfort and health.
Torso-to-thigh angle: The angle between your torso and thighs should stay between 90 and 120 degrees. Smaller angles increase spinal compression and muscle strain. Larger angles over time can weaken stabilizer muscles. Most people find 100-110 degrees most comfortable for long sessions. To fine-tune recline for spinal health, use our optimal recline angles guide.
Weight capacity & durability: If you weigh more than 250 lbs, a standard Class 3 gas lift (the pneumatic cylinder that holds the chair up) is prone to early failure. Look for Class 4 gas lifts and reinforced bases tested under ANSI/BIFMA X5.1 standards. Durability isn't vanity; it's cost of ownership. A chair that lasts five years costs less per year than one that fails after two.
Percentile fit: Industry standards define "average" as fitting anyone from the 5th percentile female (roughly 5'0") to the 95th percentile male (roughly 6'2"). If you fall outside that range (say you're 5'2" or 6'6"), you need a chair with extreme adjustability or a specialized model. Forcing yourself into a "standard" size guarantees long-term pain.
Your 20-Minute Setup Checklist
Here's a time-boxed flow to dial everything in on day one:
Minutes 1-5: Measure & sit
- Jot down your height, inseam, hip width
- Sit back fully into the chair
Minutes 6-10: Seat height, depth, and lumbar support
- Adjust height until elbows are at 90 degrees
- Slide seat depth so 2-4 fingers fit behind your knees
- Dial in lumbar height and firmness
Minutes 11-15: Backrest, armrests, and recline
- Confirm backrest reaches at least mid-shoulder
- Adjust armrests to elbow height at 90 degrees
- Dial recline tension until you feel supported but not locked
Minutes 16-20: Test and tweak
- Type for a few minutes, checking for shoulder strain
- Recline slightly, checking for lumbar contact
- Micro-adjust any control that feels off
- Take a photo or note the lever positions (you'll want to return to this)
One Week In: The Compound Effect
Small fit tweaks compound into big comfort and focus dividends. After a few days, your body adapts to the new support. After a week, you'll notice:
- Fewer end-of-day aches
- Easier transitions between typing and reading (because recline support is dialed in)
- Less fidgeting and more flow (because the chair isn't creating pressure hotspots)
- Better posture without effort (because the lumbar support does the work, not your muscles)
If something feels off after a week (say your lower back is sore or your right shoulder is tight), resist the urge to buy a new chair. Instead, revisit one adjustment at a time. Often, a quarter-turn on the lumbar dial or a half-inch shift in seat depth solves it.
Your Next Step
Pick one adjustment today (the one that bothers you most). Seat depth causing knee pressure? Fix that first. Armrests too high? Dial those down. Spend five minutes making that one change, then work normally for a few hours. Notice the difference. That small win builds confidence and momentum. Once one control feels right, you've got the taste for what good fit means. Tackle the next one tomorrow.
Confidence with controls is half the battle. The other half is committing to the small tweaks that compound over time. Your health, your focus, and your end-of-day energy will thank you.
Related Articles